Whether our pets’ fur needs to be clipped is still a contentious issue. Many vets often argue against it, since animal fur, including the fur of common household pets like dogs and cats, acts like natural insulators. Thus, trimming down pet hair, which basically keeps your pet warm during chilly weather and vice versa, is in actuality counter-intuitive to their comfort. On the other hand, some pets actually prefer shorter hair, feeling lighter and less cumbersome after a trim, whilst other conditions can actually necessitate a grooming session. If your pup, kitten or other furry friend is experiencing a painful skin condition like hot spots or rashes, or has longer fur (think Goldendoodles, or Angora rabbits) you’re having trouble brushing down regularly to keep it from getting painfully matted up, keeping pet hair clipped shorter might be the smarter course of action.
Nonetheless, be it to keep your pup feeling light and free or to give them a less unkempt appearance, a good clipping session does not necessarily mandate a trip to the groomer’s. With the right tools and tips – and a little additional guidance and practice – you can become fully equipped to groom your pet right from the comfort of your home, keeping your wallet fuller in the process.
Step One: Prep
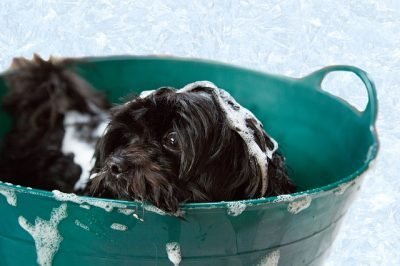
The clipping business is so much easier, especially for a novice to the task, when your clipper doesn’t snag on a tangle of fur or keep getting jammed scooping out loose hair your pet’s been shedding every two seconds. Not only is it inconvenient and slow going for you, but the clipper pulling against tangled or matted fur can be very painful for your pet, and create a form of negative reinforcement whereby they’ll be reluctant to have their hair trimmed in the future because they associate it with an unpleasant experience.
Bathing your pet can help with that, getting rid of any of the dead skin and loose hair which might give you trouble later, as well as leaving your pet’s fur smoother and softer and therefore easier to work with. Brushing or combing pet hair also picks up shed fur and helps remove tangles. Remember to always use a brush to gently coax tangles apart rather than yanking at them with a comb; it hurts our pets as much as it would hurt us and we want them to be as calm as possible through the whole process to avoid any accidents. And while we’re on the subject of keeping them calm –
Step Two: Pick the right tools
Many animals often don’t take to the clipping process – they can get nervous, jittery and agitated and it’s important to ensure the process is as stress-free for them as possible so they can get used to it and even learn to relax and enjoy themselves while they’re getting their new ‘do. Part of this is reliant on how you handle your pet, creating positive reinforcement by praising and rewarding them for keeping still and letting you do the dirty work, giving them breaks and holding them down gently but firmly when need be.
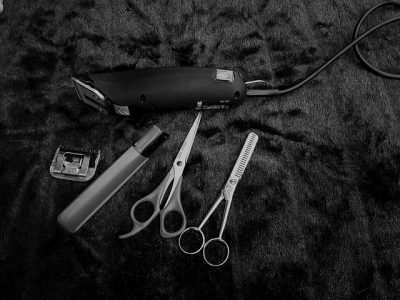
Another important decision you’ll be making is the actual clipper you use. Buzzing, vibrating clippers can make your pets nervous, so where possible, go with a quiet machine – you’re less likely to alarm or distress your animal this way.
Then comes the question of picking a clipper with the right blades. As a novice, you’ll want something that’ll let you go slow and steady with minimal risk of accidents, so for starters, we recommend avoiding skip-tooth blades – these blades are structured with alternate longer and shorter blades, and work better in the hands of a professional. In inexperienced hands, you might mistakenly snag folds of your pet’s skin in between the tooth gaps and accidentally injure them. Go for Finish-Cut blades instead – these are usually labelled with the abbreviations FC or F, preceded by a number denoting the length of the blade.
What length of blade you need is determined by the type of trim you’re looking to give your pet as well as the type of fur your pet has. If you are looking for a closer cut, go with higher numbers – #5 and above. For longer cuts, go with lower numbers. The general rule of thumb to determining the blade length you need is to remember that the shorter the cut, the higher the number, and the longer the cut, the lower the number. For first-timers, we recommend a #5 for cutting hair shorter, and #3 for a longer, fluffier look, though this varies with the animal and the type of coat you’re clipping – for long- and thick-haired animals, including livestock, you might need higher numbered blades anywhere between #10 and #50 just to get through the dense mop.
Step Three: Going with the flow –
– or in this case, with the lay of your pet’s fur. For the cleanest, smoothest cut, clip your pet’s hair in the direction it grows, from the back of the head and neck, down your pet’s spine, down to the tail, and then the legs. Hold your pet’s skin taut while you clip – this prevents folds of skin getting caught between the blades and avoids cuts and abrasions. If you need to trim hair around any sensitive areas, like the pet’s private parts or anywhere near their eyes, always double-check the recommended blade length to do so safely, or opt out for scissors instead if you’re nervous. Touch the tip of the blade to your pet’s skin, angling the back, and make sure the tip glides without skipping for the cleanest trim.

If you are uncertain about the type of blade to use or the kind of trim to suit your pet’s fur (different techniques work better depending on whether your pet has smooth, wiry or curly fur) it would be worthwhile to consult a groomer for advice on what to keep in mind when specifically grooming your pet. For instance, though the general rule posits clipping following the lay of the hair, for dogs with flat and smooth fur going against the lay might give you better results, while the same technique might leave fluffier pups looking unkempt and shoddily groomed.
Step four: Troubleshoot
While clipping, you might find your blade has jammed, and you’re ineffectually pulling it through your pet’s fur, or that the clipper has started to heat up and might risk hurting or causing discomfort to your pet. Both problems can be dealt with using a coolant or other lubricant – it helps loosen the hair stuck between the metal components of the clipper jamming it, while also cooling off the blades until they’re comfortable to use again. You might also want to have an extra clipper or clipper blades on hand so you can switch one out for the other, or work at intervals to let the clipper cool while your pet takes a break. Also go for clippers with interchangeable blades – if you’re using blades which dull quickly and can’t be sharpened or switched out, you’ll only end up tugging at your pet’s hair and causing them discomfort, while a unit compatible with different lengths of blades gives you more flexibility and diversity of use.